Quantcast
Channel: Dev.WPTools – WPCubed

WPTools: How to quickly create and print a multiplication table

$
0
0

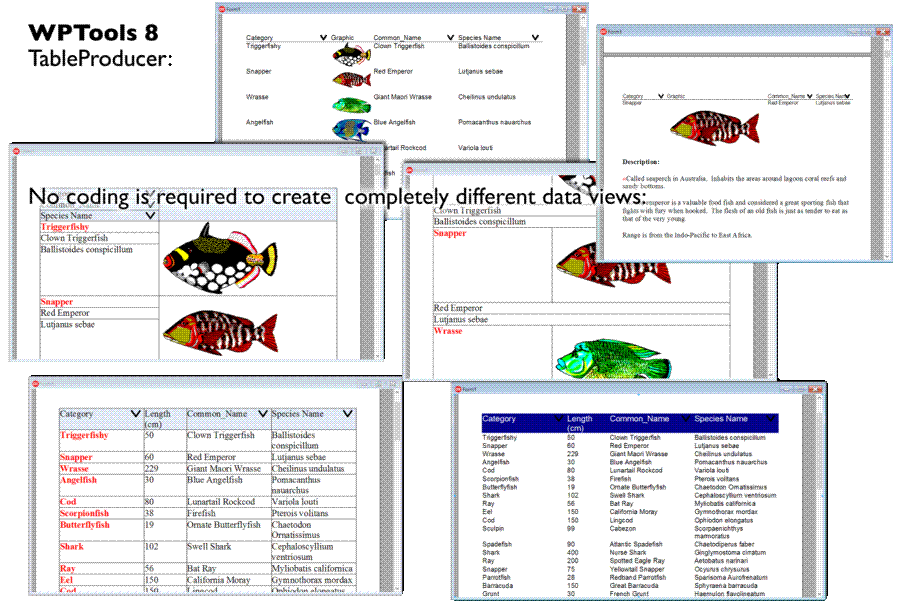
This Topic discusses three possible ways to create and display tabular data in WPTools.

As a fairly simple yet useful example a calculation table should be created. All numbers in the range from 1 to 2 should be multiplied with each other. The square numbers should be bold and the output should be right aligned.

With WPTools just a few lines are required to print such a table and printing can be done by calling the function “Print”.

The first example also features the programmatic activation of paragraph borders and the creation of tabstops.

This is the output:
20by20table

And here I show the Pascal code which puts each multiplication line from 1 to 20 into a single paragraph:

procedure TForm3.btn20by20Click(Sender: TObject);
var i, a : Integer;
begin
  WPRichText1.Header.SetPageWH(0,0,760,360,760,360);
  WPRichText1.Header.Landscape := true;


  for i := 1 to 10 do
     WPRichText1.CurrAttr.AddTab(i*1440, tkRight);

  for i := 1 to 20 do
  begin
    WPRichText1.CurrAttr.SetCellBorders(tsFALSE, tsFalse, tsFalse, tsTRUE, tsTRUE);

    for a := 1 to 20 do
    begin
       if i=a then
          WPRichText1.CurrAttr.AddStyle([afsBold]);
       WPRichText1.InputString(
         Format(#9+'%d * %d = %d', [ i, a, i* a] ));
       if i=a then
          WPRichText1.CurrAttr.DeleteStyle([afsBold]);
       if a=10 then
         WPRichText1.InputString(#10);
    end;
    WPRichText1.InputString(#13);
  end;
end;

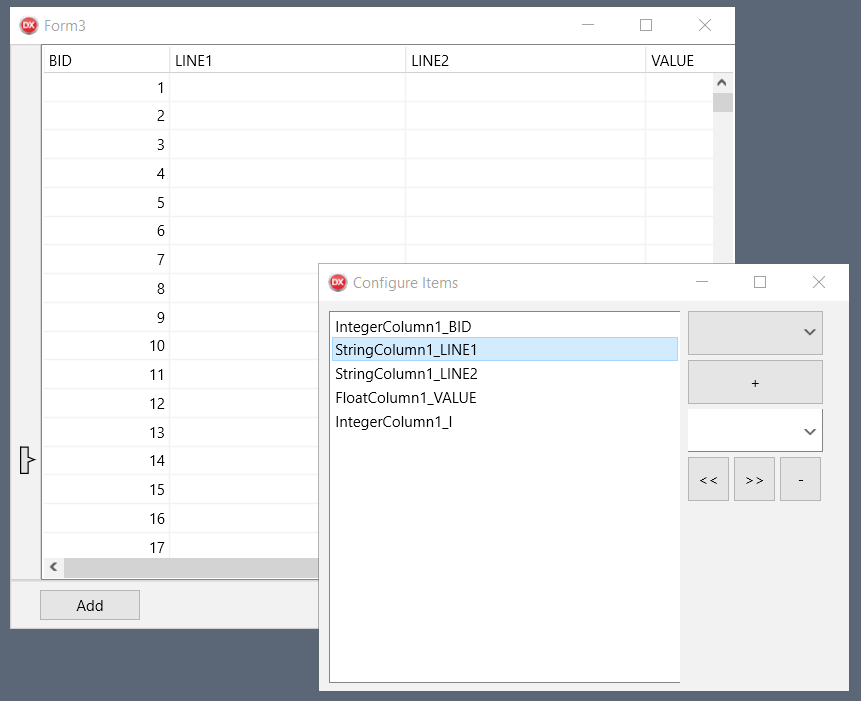
But what about tables? They can also be created quite easily with WPTools.
To solve a problem like this I modified the code above to subsequently fill a table.

var i, a : Integer;
begin
  WPRichText1.Header.SetPageWH(0,0,760,360,760,360);
  WPRichText1.Header.Landscape := true;

  // Create a table and goto first row
  WPRichText1.ActiveParagraph := WPRichText1.AddTable(10,40,true);

  for i := 1 to 20 do
  begin
    for a := 1 to 20 do
    begin
       if a>10 then
            WPRichText1.MoveToCell( a-11, (i-1)*2 + 1)
       else WPRichText1.MoveToCell( a-1, (i-1)*2);

       WPRichText1.CurrAttr.Alignment := paralRight;
       WPRichText1.CurrAttr.IndentRight := 36;

       if i=a then
          WPRichText1.CurrAttr.AddStyle([afsBold]);
       WPRichText1.InputString(
         Format('%d * %d = %d', [ i, a, i* a] ));
       if i=a then
          WPRichText1.CurrAttr.DeleteStyle([afsBold]);
    end;
  end;
end;

With the code above you will probably notice that it takes some time to get executed. The reason for that is that InputString actually simulates keyboard input. The component delays the reformat of the text to the time when all code has been processed, but still, inserting text through InputString is not the fastest.

Fortunately it is easy and straight forward to create real low level code which works with the WPTools paragraphs (also cells are instances of TParagraph) directly.

It is also possible to set styles directly:

Create a style, sid is an integer variable.

with WPRichText1.ParStyles.Add('squarenumbers') do
  begin
    sid := id;
    TextStyle.ASetCharStyle( tstrue, WPSTY_Bold );
    TextStyle.ASetColor(WPAT_BGColor, $E0E0E0);
  end;

The style ID can be assigned to the Style property of any paragraph or cell.

The code below works with low level table creation. It is executed basically instantly.
It does not matter if the I loop goes up to 20, 200, or even 1000.
In the last case it would create over 90 pages and display them the moment the button was pressed!

procedure TForm3.CreateTableFastClick(Sender: TObject);
var aTable, aRow, aCell : TParagraph;
    i, a, sid : Integer;

begin
  WPRichText1.Header.SetPageWH(0,0,760,360,760,360);
  WPRichText1.Header.Landscape := true;

  // We create a style to highlight the square numbers, such as 2*2=4
  with WPRichText1.ParStyles.Add('squarenumbers') do
  begin
    sid := id;
    TextStyle.ASetCharStyle( tstrue, WPSTY_Bold );
    TextStyle.ASetColor(WPAT_BGColor, $E0E0E0);
  end;

  // Low level table creation
  // First create the parent table object
  aTable := WPRichText1.ActiveText.AppendTable();
  for i := 1 to 1000 do
  begin
    // In the parent table append a new row
    aRow := aTable.AppendNewRow();
    for a := 1 to 20 do
    begin
       // In the row create a cell
       aCell := aRow.AppendNewCell();
       // Set the border
       aCell.ASetBorderFlags(15);
       // the alignment
       aCell.ASet(WPAT_Alignment, Integer(paralRight));
       // and for squere numbers use the style created above
       if i=a then
          aCell.Style := sid;


       aCell.SetText( Format('%d * %d = %d', [ i, a, i*a] ) );
       if a=10 then aRow := aTable.AppendNewRow();
    end;
  end;
  // Dont forget to call ReformatAll since WPTools does not
  // call it automatically after low-level changes to the text
  WPRichText1.ReformatAll();
end;

The code above also uses a special property: WPRichText1.ActiveText. This is the layer which currently has the cursor focus. It can be the body text, a header or footer text, or, with the Premium edition, also a footnote or textbox. It is an instance of the class “TWPRTFDataBlock“.

Der Beitrag WPTools: How to quickly create and print a multiplication table erschien zuerst auf WPCubed.


WPCubed Calculus: The Datamodule

$
0
0

As described in the previous topic SQLight is used as the database.  Delphi XE7 Professional includes the FireDAC components which serve as interface to the database. Since the interface components do not allow the automatic creation of tables and fields from the FieldDefinitions a SQL CREATE script is used instead. This script will be executed when a new database is generated.

All the tables use one field with the name UID as primary index field. Relational tables use fields with the name “…_ID” to connect to the main table, i.e. “CUSTOMER_ID” in the ORDER table. I use an INTEGER PRIMARY KEY AUTOINCREMENT as primary index field which provides fast lookups with SQLLight. (There are no secondary indexes defined in the database yet, to optimize sorting performance they can be added anytime later).

This is an excerpt of the SQL script which creates the tables for the WPCubed Calculus Multi-Demo. As mentioned in the introduction, only the bare minimum of tables and fields for this tasks are used by the application to not obscure what is essential for the task:

CREATE TABLE "COUNTRIES" (
    "UID" INTEGER PRIMARY KEY AUTOINCREMENT NOT NULL,
    "NAME" varchar(60),
    "EU" INTEGER,
    "VAT_RATE_REDUCED" REAL,
    "VAT_RATE_REDUCED_LOW" REAL,
    "VAT_RATE" REAL,
    "CODE" varchar(6),
    "DATE" DATE
);

CREATE TABLE "CUSTOMERS" (
    "UID" INTEGER PRIMARY KEY AUTOINCREMENT NOT NULL,
    "NAME" varchar(100), // We only have a limited number of adress
    "ADR1" varchar(100), // field in this demo application
    "ADR2" varchar(100),
    "CITY" varchar(100),
    "STATE" varchar(100),
    "EMAIL" varchar(100),
    "COUNTRY_ID" INTEGER,
    "VAT_ID" varchar(20), // this is the VAT tax number
    "COMMENT" varchar(100),
    "REBATE" REAL
);

CREATE TABLE "PRODUCTS" (
    "UID" INTEGER PRIMARY KEY AUTOINCREMENT,
    "NAME" varchar(100),
    "DESCRIPTION" varchar(200),
    "PRICE" REAL,
    "VAT_SELECT" INTEGER // Select VAT, 0=normal, 1=reduced
);

CREATE TABLE "ORDERS" (
    "UID" INTEGER PRIMARY KEY AUTOINCREMENT,
    "ORDER_DATE" DATE,
    "ORDER_DATE_YEAR" INTEGER,
    "ORDER_DATE_MONTH" INTEGER,
    "CUSTOMER_ID" INTEGER,
    "COUNTRY_ID" INTEGER,
    "VAT_ID" varchar(100),
    "EUTRADE" INTEGER,
    "REFERENCE" varchar(100),
    "CUSTOMER_ADR" varchar(300),
    "VAT_RATE" REAL,   
    "VAT_RATE_REDUCED" REAL,
    "VAT_RATE_REDUCED_LOW" REAL,
    "VOID" Integer
);

CREATE TABLE "ORDERITEM" (
    "UID" INTEGER PRIMARY KEY AUTOINCREMENT NOT NULL,
    "ORDER_ID"    INTEGER NOT NULL,
    "CUSTOMER_ID" INTEGER NOT NULL,
    "PRODUCT_ID"  INTEGER NOT NULL,
    "VAT_SELECT"  INTEGER NOT NULL,
    "COUNT" REAL,
    "TEXT" varchar(100),
    "UNIT_PRICE" REAL,
    "REBATE_PERCENT" REAL,
    "REBATE_ABSOLUT" REAL,
    "PAYMENT_ID" INTEGER
);

These are the main component in the data module to set up the data connection:

MD_DataModule1

As described in the introduction the demo was created to also integrate value added tax handling (VAT). To do so, I located the VAT rates (http://ec.europa.eu/taxation_customs/taxation/vat/how_vat_works/rates/index_en.htm) and created a constant record array to initialize the country table. Please use this table with care since the values may be outdated in the meantime.

type TEUCountry = record
    name, en_name, code : String;
    red1, red2, vat : Single;
end;

// VAT table of July 2014 - Source:
// http://ec.europa.eu/taxation_customs/taxation/vat/how_vat_works/rates/index_en.htm
// We did not copy the "parking rate" and the "super reduced rate"


const EUCountries : array[1..28] of TEUCountry

= ( (name:'Belgien';  en_name:'Belgium';  code:'BE'; red1:6; red2:12; vat:21),
(name:'Bulgarien';  en_name:'Bulgaria';  code:'BG'; red1:9; red2:9; vat:20),
(name:'Tschechische Republik';  en_name:'CzechRepublic';  code:'CZ'; red1:15; red2:15; vat:21),
(name:'Dänemark';  en_name:'Denmark';  code:'DK'; red1:25; red2:25; vat:25),  // DK does not have a reduced rate!
(name:'Deutschland';  en_name:'Germany';  code:'DE'; red1:7; red2:7; vat:19),
(name:'Estland';  en_name:'Estonia';  code:'EE'; red1:9; red2:9; vat:20),
(name:'Griechenland';  en_name:'Greece';  code:'EL'; red1:6.5; red2:13; vat:23),
(name:'Spanien';  en_name:'Spain';  code:'ES'; red1:10; red2:10; vat:21),
(name:'Frankreich';  en_name:'France';  code:'FR'; red1:5.5; red2:10; vat:20),
(name:'Kroatien';  en_name:'Croatia';  code:'HR'; red1:5; red2:13; vat:25),
(name:'Irland';  en_name:'Ireland';  code:'IE'; red1:9; red2:13.5; vat:23),
(name:'Italien';  en_name:'Italy';  code:'IT'; red1:10; red2:10; vat:22),
(name:'Zypern';  en_name:'Cyprus';  code:'CY'; red1:5; red2:9; vat:19),
(name:'Lettland';  en_name:'Latvia';  code:'LV'; red1:12; red2:12; vat:21),
(name:'Litauen';  en_name:'Lithuania';  code:'LT'; red1:5; red2:9; vat:21),
(name:'Luxemburg';  en_name:'Luxembourg';  code:'LU'; red1:6; red2:12; vat:15),
(name:'Ungarn';  en_name:'Hungary';  code:'HU'; red1:5; red2:18; vat:27),
(name:'Malta';  en_name:'Malta';  code:'MT'; red1:5; red2:7; vat:18),
(name:'Niederlande';  en_name:'Netherlands';  code:'NL'; red1:6; red2:6; vat:21),
(name:'Österreich';  en_name:'Austria';  code:'AT'; red1:10; red2:10; vat:20),
(name:'Polen';  en_name:'Poland';  code:'PL'; red1:5; red2:8; vat:23),
(name:'Portugal';  en_name:'Portugal';  code:'PT'; red1:6; red2:13; vat:23),
(name:'Rumänien';  en_name:'Romania';  code:'RO'; red1:5; red2:9; vat:24),
(name:'Slowenien';  en_name:'Slovenia';  code:'SI'; red1:9.5; red2:9.5; vat:22),
(name:'Slowakei';  en_name:'Slovakia';  code:'SK'; red1:10; red2:10; vat:20),
(name:'Finnland';  en_name:'Finland';  code:'FI'; red1:10; red2:14; vat:24),
(name:'Schweden';  en_name:'Sweden';  code:'SE'; red1:6; red2:12; vat:25),
(name:'Vereinigtes Königreich';  en_name:'United Kingdom';  code:'UK'; red1:5; red2:5; vat:20) );

Adding the EU countries to the table is easy:

procedure TWPDataModule.AddEUCountries;
var i : Integer;
begin
  for I := Low(EUCountries) to High(EUCountries) do
  begin
    tblCountry.Append;
    tblCountryNAME.AsString := EUCountries[i].en_name;
    tblCountryCODE.AsString := EUCountries[i].code;
    tblCountryEU.AsInteger := 1;
    tblCountryVAT_RATE_REDUCED.AsFloat := EUCountries[i].red2;
    tblCountryVAT_RATE_REDUCED_LOW.AsFloat := EUCountries[i].red1;
    tblCountryVAT_RATE.AsFloat := EUCountries[i].vat;

// This is the date the VAT value was valid – according to

// the quoted document.
    tblCountryDATE.AsDateTime := EncodeDate( 2014, 7, 1);      tblCountry.Post;
  end;
end;

A database is opened or created with this method:

procedure TWPDataModule.DataOpen(Filename : String);
  var createnew : Boolean;
begin
    createnew := not FileExists(Filename);
    with dbMain do begin
    Close;

    // create temporary connection definition
    with Params do begin
      Clear;

      Add('DriverID=SQLite');
      Add('Database=' + FileName);
    end;

    Open;

    if createnew then
    begin
      FDQuery1.ExecSQL;
    end;

      try
        tblCountry.Open;
        tblCustomers.Open;
        tblCustomersLookup.Open;
        tblOrderItems.Open;
        tblOrders.Open;
        tblProducts.Open;
        // … open other tables

      except
         Close;
         createnew := false;
      end;

      if createnew then
      begin
          AddEUCountries;
          AddSampleData;
      end;
    end;
end;

The Methods AddEUCountries fills the country table with the items of the VAT list above, AddSampleData adds some customer and product data so the program does not start completely empty.

Der Beitrag WPCubed Calculus: The Datamodule erschien zuerst auf WPCubed.

Happy Birthday WPTools

$
0
0

Happy Birthday WPTools!

Did you know that WPTools V1 first became available on January 15, 1996?
Originally introduced in 1995 as the successor to TurboPascal, Delphi quickly became a very successful Borland product. Then on January 15, 1996 Julian Ziersch published a new component – WPTools – which allowed programmers to easily add word processing features to their projects. At this time it was available in the CompuServe network (remember that?).

In 1997 the renowned ZAC catalog listed WPTools as a prominent component for Delphi programmers:

WPTools in 1997
WPTools in 1997

In 2004 the main parts of WPTools were completely rewritten to support modern compiler features, to improve security by removing pointers and to optimize the WYSIWYG-experience of the users.
At that time WPTools was the only VCL component which allowed you to edit headers, footers, footnotes and also text boxes in page layout view, completely in WYSIWYG mode.
Now, 19 years after the release of WPTools V1, WPCubed not only offers programmers a complete spectrum of word processing, reporting and PDF tools. These include WPTools 7, WPViewPDF 3, wPDF 4 and WPSpell, only to name the VCL components here.

Today, to celebrate WPTools’ 19th year, WPCubed is introducing a new exciting add-on to WPTools: MS-Word DocX reading and writing capabilities. This add-on will be available for licensing shortly.

During development of this add-on special attention was paid to implement WPTools fields and WPReporter bands in such a manner that the documents could be saved and changed in MSWord and then re-opened in WPTools with everything still intact.

View WPReporter Template in MS Word

We’re really excited about this product.

Click to go to the download page “sample word processor” …

The demo was compiled with WPTools 7 “Premium“. This demo lets you “play” with the word processing features of our text components. It is just a prototype and comes without any warranty of any kind. In the lower right corner it print “www.WPCubed.com”.

Der Beitrag Happy Birthday WPTools erschien zuerst auf WPCubed.

Draw letterheads in WPTools editor

$
0
0

Today I thought of something new (even if it is old)! The event OnPaintWatermark can be used with a TWPRichText to draw a watermark.

It is very easy to print a metafile as letter head:

procedure TForm1.WPRichText1PaintWatermark(Sender: TObject;
  RTFEngine: TWPRTFEnginePaint; toCanvas: TCanvas; PageRect: TRect; PaintPageNr,
  RTFPageNr: Integer; WaterMarkRef: TObject; XRes, YRes: Integer;
  CurrentZoom: Single; PaintMode: TWPPaintModes);
begin
  toCanvas.StretchDraw(PageRect, Image1.Picture.Graphic);
end;

But in some cases the customers want a letterhead they can configure. Why not use a TWPRichText to let the user edit their letterhead? They can add images and tables, and even movable text boxes. (requires WPTools “Premium“)

The code is almost as simple as the above – simply the PrintPageOnCanvas method for a second TWPRichText is called:

procedure TForm2.WPRichText1PaintWatermark(Sender: TObject;
  RTFEngine: TWPRTFEnginePaint; toCanvas: TCanvas; 
  PageRect: TRect; PaintPageNr,
  RTFPageNr: Integer; WaterMarkRef: TObject; XRes, YRes: Integer;
  CurrentZoom: Single; PaintMode: TWPPaintModes);
begin
  BackgroundRTF.PaintPageOnCanvas(
     0,
     PageRect.Left,
     PageRect.Top,
     PageRect.Width,
     PageRect.Height,
     toCanvas,
     [wppGrayAll, wppGrayHeaderFooter, ppWhiteIsTransparent ],
     0,
     0,
     -1,
     -1,
     [wpNoViewPortAPI, wpNoViewPortOrgAPI]
      );
end;

The flags wppGrayAll and wppGrayHeaderFooter are optional, they will text page be drawn using gray instead of black.

The flags wpNoViewPortAPI, wpNoViewPortOrgAPI have to be used to make sure the BackgroundRTF is rendering in the scrolling position context of the main editor.

The text in BackgroundRTF may contain page number objects. To make these use the page number of the main editor add this two assignments:

BackgroundRTF.Memo.OverridePageCount := WPRichText1.PageCount;
BackgroundRTF.Memo.OverridePageOffset := PaintPageNr;

Der Beitrag Draw letterheads in WPTools editor erschien zuerst auf WPCubed.

How to install multiple versions of Delphi on the same machine

$
0
0

As a component developer I have to install all recent Versions of Delphi on the same machine. This is required to run a script which creates the object files required by the customers. There are still numerous customers who use Delphi 5 – no wonder, it was stable and creates compact applications and why change a running system?

In general it is not a problem to install different Delphi (or RAD Studio) versions side by side. But I recommend not to install them under “Program Files” but into a custom folder, such as “C:\Embarcadero\”. Also installing components into “Program Files” is not such a good idea, since this folder is write protected since Windows 7.

But, anyway, after installing several IDEs (not just Delphi) you will run eventually into an unexpected problem. This is the global search path, the environment variable “PATH”. That search path is used to locate modules (such as DLLs or BPLs) which are not found in the home directory of an application. Unfortunately the maximum length for the contents of PATH is limited to 255(!) characters only. You can imagine how soon these few bytes are filled after some applications added “their” path to it. I also noticed that some components add the path to their runtime BPLs here. If you install those components under “C:\Program Files\Company Name\Special Component Name\BPL” this will use a lot of bytes in the PATH. (BTW.: WPTools does not do this)

So what is the solution? You can manually edit PATH by selection “System” in the Windows control center and there open “Extended System properties” and within the dialog “System variables” (German: “Umgebungsvariablen”).

    Do this at your own risk!

Copy the value of “PATH” to an editor which does not add carriage returns. You can use WPTools, TextDynamic or NotePad++, but not the regular Notepad. Please make a backup copy of this path to a TXT file. Now you can check which parts of the text are used very often, naturally this will be “C:\Program Files\” – but you will also find also other texts. You can replace each instance of a certain phrase with a system variable, i.e. replace “C:\Embarcadero” with “%EMB%” within the editor. You need to remember the name of the variable and the string it should represent. Since, after you have copied back the edited PATH text into its place as a system variable, you need to create new system variables to fill in the missing pieces, i.e. EMB=C:\Embarcadero.

Using this technique I installed Delphi 5 to Delphi XE8, Eclipse, different Visual Studios and various tools. So far I have no problems and I am not aware of any significant bad sideffects of the workaround mentioned above. If you experience one, please drop me a line (support@wptools.de) and I will add a note here. One effect I noticed though, is that some installers or applications will try to add “their” path again, since they are not able to evaluate the substitution with a different system variable.

If, for some reason, the technique does not work for you, please copy back the copy of the original PATH which you have saved to a file as backup.

Der Beitrag How to install multiple versions of Delphi on the same machine erschien zuerst auf WPCubed.

What’s new in WPTools 8

$
0
0

1) Dynamic/Live database tables in the document (included in “Premium” and Bundle editions)

Do you need to present the user the result of a database query and also print it? With WPTools’ dynamic tables the user can not only browse the result of the query, but also change the appearance of the table and the data cells and print it in WYSIWYG manner.

In contrast to “data-grid” solutions, it is also possible to copy part of the created tables and paste them directly into a word processor program or, of course, TWPRichText. The dynamic table feature is controlled by a new component: TableProducer.

2) Improved TWPMMDataProvider

Using this component it is even easier to create a form to display text and images from a database. It also support updating the database when the user changes the text in a field inside of the editor.

It now also supports fields which store the name of a certain image to be loaded into an image object.

3) Sorting and Filtering in tables.

Now it is possible to sort a table by comparing text in a certain column. Similarly it is also possible to hide rows which meet certain criteria. The sorting logic has been developed carefully, so it is possible to even sort a table with mixed data rows such as in the screen shot above. Rows which belong to a certain “master” row, will be handled as if they were children of that row, this means that sorting will not move the data apart and filtering will hide the sub data row when the master data row was also hidden.

API: WPRichText.TableFilterSort

3) Improved style scrolling component – TWPStyleScroller.

With this component the user can quickly select a paragraph styles for the selected text.

4) Numbering has been revised.

Numbering now allows the use of multiple outline groups in one document. When appending a document in WPT format, it is now (optionally) possible that the included outline groups are added which makes sure, that the numbering starts new for each appended text.

The Distance between number text and headline is now automatically adjusted:

The number dialog has been updated and it now also allows the creation of new and additional outline definitions.
While the numbering dialog is open, the current numbers in the document are being highlighted.
Using the context menu of the number items in the dialog it is possible to replace a number- or outline style in the document.

5) Rotated Labels

The improved TWPTextObject makes it possible to display a vertical label in a table.

Example: ATable.rows[0].cols[0].SetTextObject( ”, ‘SomeText’, [wpTextRotate90]);

This feature is not supported in Delphi 5, 6 and 7.

6) Dynamic Objects

This objects are displayed for a paragraph and make it possible to add clickable buttons to a paragraph or cell.

(used for selection marks, cursor and column sort buttons.)

7) Live Binding

The TWPRichText now supports LiveBinding

8) Interactive Cursor and Selection – with touch support

9) Touch support for scrolling and zooming

When a touch screen is used, the text can be scrolled and zoomed using gestures automatically.
Touch.InteractiveGestures := [] disables the touch support if necessary.

10) function TParagraph.CharAttrModify()

Using this new function it is now possible to modify the attributes of text of a TParagraph directly.
This will not change the attributes which are used by all characters, but the “CharAttr” assoziated with each singular character.

procedure TParagraph.CharAttrModify(
WPAT_Code : Integer;
Value : Integer;
ModifyMode : TWPCharAttrModifyMode = wpSetValue;
StartPos : Integer = 0;
Len : Integer = MaxInt );

TWPCharAttrModifyMode = (wpSetValue, wpSetColorValue, wpDelete, wpAddValue, wpSubtractValue {not negative!} , wpOrValue, wpAndNotValue);

11) Property HandleRichEditMsg

If this property is true, the editor accepts some messages also supported by RichEdit. This makes it possible to use dictation software with WPTools.

12) Much enhanced footnotes in WPTools “Premium”

Footnotes were in WPTools “Premium” since many years now. But with WPTools 8.01 the support was much enhanced. Any footnote may now be longer than one page, in fact it can span multiple pages! (If you need the old behavior which created a new page when a footnote did not fit on the current, you can still activate this in in the property FormatOptionsEx.)

Other improvements and fixes:

+ Print a TWPTextObject as bitmap. This is useful to hide the text from mail service applications (usually printer driver)
which analyse the text on a page to read the address a letter should be sent to. (wpPrintAsBitmap)
+ TableAdd can create up to 3 table header and up to 3 footer rows.
+ TParagraph.QuickFind(‘{~*~}’ … can be used to locate tokens in the text.
+ WPGutter: Collapse grouped areas in a table
+ ValueEdit – preserve value loaded from DFM
+ MailMerge – can be preformed in a “ReadOnly” fashion
+ MailMerge – LoadImageFromFile
and hundreds of more small changes to improve the editing experience
* GetCharAttr has new options
* improved text search

Der Beitrag What’s new in WPTools 8 erschien zuerst auf WPCubed.

DBGrid for Firemonkey?

$
0
0

For in-house use I developed a specialized book-keeping software. Its main purpose is to do multiple calculations, such as taxes and expenses. Since it would be nice that this program also works with MAC-OS, I checked if it would be possible to convert the VCL application to FireMonkey. The project mostly uses standard components, WPTools and wPDF. At least as an alpha, WPTools already works with Firemonkey (OSX and Windows) – so the reporting code would work without many changes.
But how to display the data tables? To do so, the project uses the standard TDBGrid. Firemonkey has a TGrid which can be quite easily be connected to a database with data binding. But when using customized columns, this also implies a quite complicated network of binding controls which I wanted to avoid since ideally the Firemonkey and the VCL project would share the data-module and the reporting code.


So I created a data sensitive version of the TGrid which has this advantages:

  • Can be easily connect to a regular TDataSource
  • Customizeable columns
  • Show position in database with index column
  • Runtime customization

The component is free to download and use when you register in our newsgroup.

Der Beitrag DBGrid for Firemonkey? erschien zuerst auf WPCubed.

What’s new in WPTools 9

$
0
0

1) Improved component WPImagelist which holds the icons for the TWPToolbar.

If you add the unit WPIcons to your project (i.e. in one uses clause) all TWPToolbars will automatically use the new, nicer icons. The color icons can now display the current color.

You can use the WPImageList with the TWPToolButtons to create a modern GUI easily. 

The WPImageList can also populate a standard TImageList.

2) PropertyGrids

To display an inspector like grid, you can use the new API AppendPropertyGrid and AppendPropertyRow.

3) Inplace Editors, Checkbox controls

The check boxes can be automatically created within property grids. But they can also be added in code to any cell or text object. Internally they are based on a “InplaceEditor” architecture which will be subsequently extended and improved. 

Now it is possible to have round and square check boxes, also with radio button functionality. It is also possible to use an event to paint the appearance, i.e. by using gylphs from the TWPImageList. The extended properties used by the inplace editors can be saved in WPT format.

4) Dynamic Tables (TableProducer component – included in  WPTools “Bundle”)

Do you need to present the user the result of a database query and also print it? With WPTools’ dynamic tables the user can not only browse the result of the query, but also change the appearance of the table and the data cells and print it in WYSIWYG manner.

In contrast to “data-grid” solutions, it is also possible to copy part of the created tables and paste them directly into a word processor program, such as MS Word or, of course, TWPRichText.

It is now much easier to create the templates for the tables in code:

template := WPTableProducerDB1.Blocks.Add('MASTER') as TWPBlockTemplateDB;
template.DataSourceName :=
WPTableProducerDB1.DataSourceLinks[0].Name;
for I := 0 to fields_master.Count-1 do
template.AddColumn( fields_master[i], nil );

We also created an extensive demo which uses the PropertyGrids and TableProducer.

5) Improved, more intuitive API

5.1) Compact coding

Many low level TParagraph methods return a reference of the used paragraph. This makes compact and easy to understand coding possible. You can simply append assignments and insertions separated with ‘.’

Example – create a page numbering footer:

WPRichText1.HeaderFooter.Get(wpIsFooter, wpraOnAllPages).Clear
.SetProperty(WPAT_Alignment,Integer(paralCenter))
.Append(wpoPageNumber)
.Append('/')
.Append(wpoNumPages);
WPRichText1.ReformatAll();

5.2) Improvement to function TableAdd to force a row break after a certain column.

5.3) There is now a simplified variant of TableAdd() which works with an anonymous procedure as callback

WPRichText1.TableAdd(10,10,
procedure(RowNr, ColNr: Integer; par: TParagraph)
begin
par.SetText('A');
end,[wptblActivateBorders]);

5.4) Function GotoBody to move the cursor which is in a text box in the body text at the closest postion

5.6) Now a colspan parameter can be specified in TParagraph.AppendNewCell

5.6) The layer TWPRTFDataBlock now includes LoadFromString and LoadFromStream with FormatString parameter

5.7) Many new functions to make programmers live more easier, i.e GetSelStartEnd, InputTextbox, etc

6) New options for the WYSIWYG header and footer support:

In property ViewOptionsEx2 this flags are supported:

wpNoBlueRectsAroundHeaderFooterWhileEditing
wpNoBlueRectsAroundTextboxWhileEditing

In property EditOptionsEx2 this flags are supported:

wpDontEnterHeaderOnClick – do not enter the header on mouse click.
On Cursor movement the body is selected instead!

wpDontEnterFooterOnClick – do not enter the footer on mouse click.
On Cursor movement the body is selected instead!

7) New possibility to automatically direct all character attribute changes to the attributes of the paragraph

>wpAttrChangeOperateOnParAttr in EditOptionsEx2

If this flag is set, a change of the font of a paragraph will not change the current writing mode or the selected text but the paragraph(!) attributes directly. The effect is, that the complete paragraph will change. Also the character attributes will automatically cleared. We uses this feature in our TableProducer demo. Here the user can change the attributes of the lines with the field names and later this attribute will be used to update the table. So the user can directly change the background color or use a bold or italic font style.

8) Support for the Windows Emoji Font.

Symbol objects can now be rendered using Direct2D (on a temporary bitmap, for compatibility). This enables the colors in certain fonts, such as the Segoe UI Emoji font. The emoticons are saved and loaded in standard RTF, HTML and DocX format.

The special rendering can be enabled using ViewOptionsEx2  and is also activated in the Insert-Symbol dialog for the font with the name in the variable WPDrawD2DTextForFont and can also be selected per object.

9) Several small but important improvements in GUI, HTML loading, RTF loading, DocX support.

+ use the global variable WPDrawRectWithBitmap_bitmap to show a themed “desktop”.

   Simply load an image from the provided resource WPShadePNG.RES.

+ Improvements in RTF reading and writing

+ Improvements in HTML reading and writing

Many improvements to editor for better usability and stability.

Der Beitrag What’s new in WPTools 9 erschien zuerst auf WPCubed.